September 23, 2026
Home Cooks: Season Cast Iron with 1–3 Thin Coats
A low-fuss method for home cooks: rub a whisper-thin coat of neutral oil, bake upside down at 450°F for an hour (1–3 coats), then maintain seasoning by...
Home Cooks: Season Cast Iron with 1–3 Thin Coats
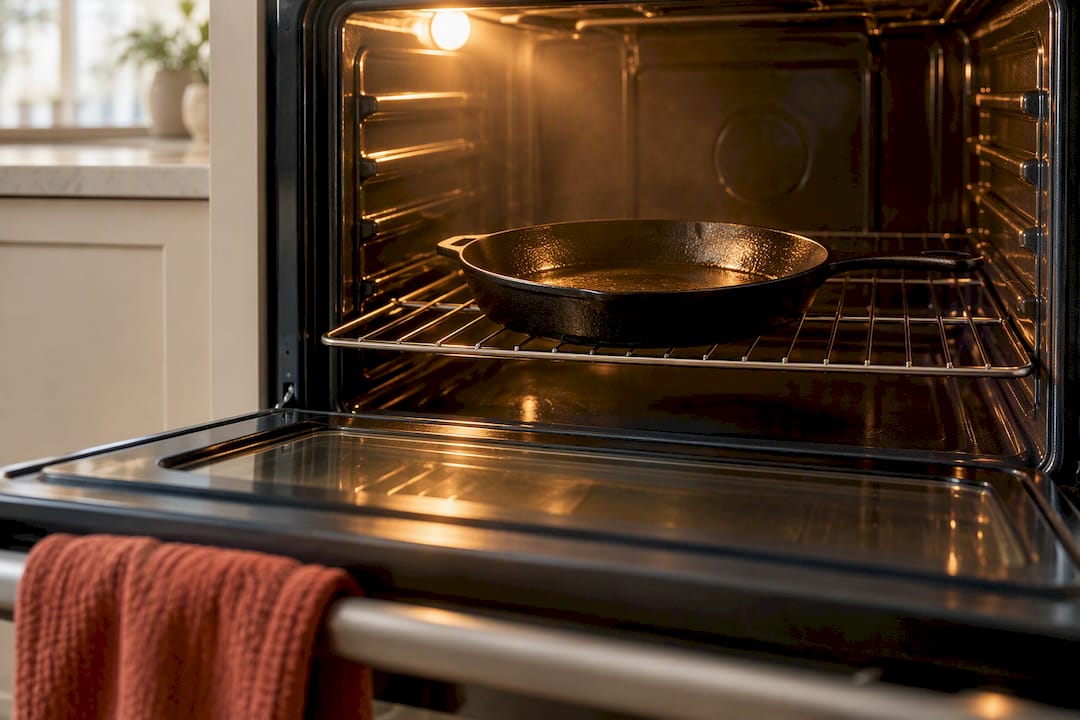
The most reliable way to season cast iron is also the least fussy: wipe on a super-thin coat of neutral oil, set the pan upside down in a hot oven, and bake it. A few coats build a solid base. After that, seasoning mostly builds up gradually with regular cooking. Just crack a window or run the vent fan since the pan will smoke a little as the oil cures.
TL;DR:
- A few thin coats of high smoke point oil baked at 450°F to 500°F create a durable seasoning layer; thick layers tend to stay sticky or flake off.
- Seasoning can be touched up on the stovetop or grill by heating with a thin oil layer, but oven baking is preferable for building or restoring a pan’s surface.
- Proper cleaning involves hot water, salt or a stiff brush, and minimal soap to preserve seasoning, with immediate dry and oil coating afterward.
- Fixing a sticky, rusty, or flaking pan typically requires thorough scrubbing down to bare metal, followed by multiple thin coats of oil baked at high heat.
- Regular use and light touch-ups, rather than frequent reseasoning, are the most effective way to maintain a well-seasoned cast iron skillet over time.
Table of Contents
- How Do You Season Cast Iron in the Oven?
- Can You Season Cast Iron Without an Oven?
- What’s the Best Way to Clean and Maintain Seasoning?
- How Do You Fix a Sticky, Rusty, or Flaking Pan?
- What Forkwardkitchen Has Learned from Testing in Cast Iron
- An Honest Take on Perfect Seasoning
- Cook Your Way to Better Seasoning
- Sources
- FAQ
How Do You Season Cast Iron in the Oven?
This is the method most tested cooking sites land on, and for good reason. It’s forgiving, it’s predictable, and it doesn’t require any special equipment.
- Wash and dry completely. Scrub the pan with hot water and a little soap if needed, then dry it by hand and heat it briefly on the stove for a minute or two. Any leftover moisture invites rust or causes the oil to bead instead of bonding.
- Pick the right oil. Reach for something neutral with a high smoke point, like canola, vegetable, or grapeseed oil, or a solid shortening. Skip extra-virgin olive oil and other flavored oils. They smoke at lower temperatures and can leave a bitter residue. Flaxseed oil has a cult following online, but it tends to flake off in sheets rather than bonding smoothly, so most home cooks are better off skipping it. If you’re curious about how smoke point affects the final finish, this breakdown of seasoning oils covers the basics well.
- Apply a whisper-thin coat. Rub a small amount over the entire pan, inside and out, then take a clean cloth and buff off what looks like excess. If you can still see an oily sheen, you haven’t buffed enough.
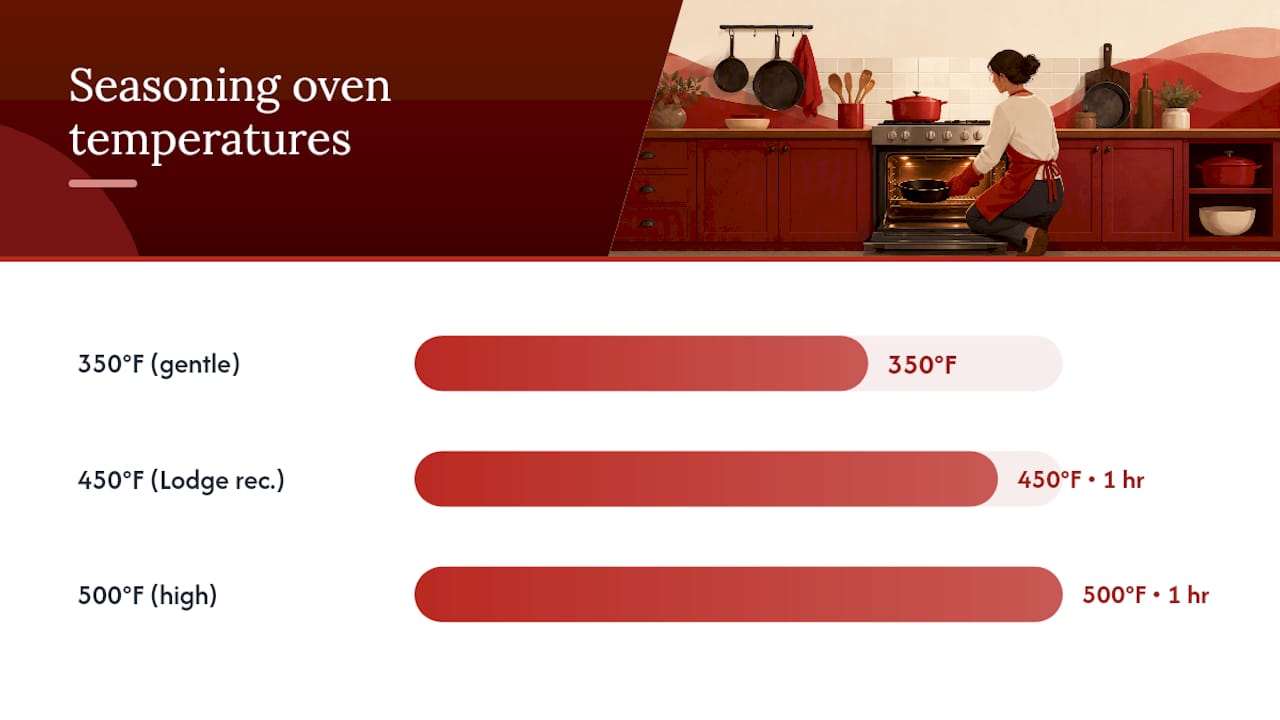
- Bake it upside down. Set the oven between 350°F and 500°F. Lodge, the cookware manufacturer, recommends 450°F to 500°F for an hour, and that’s a solid baseline. Place the pan upside down on the top rack with foil or a sheet pan below to catch any drips.
- Repeat. A new or bare pan usually needs a few coats. A pan you’ve stripped down to metal benefits from several coats.
The chemistry behind this is worth knowing. Seasoning is oil that has polymerized, meaning it’s chemically transformed into a hard, plastic-like layer once heated past its smoke point. That’s why thin coats baked at high heat beat one thick, greasy layer. Thick oil never fully cures. It just stays sticky.
Pro Tip: If your kitchen fills with smoke, that’s normal. It means the oil is hitting its smoke point and starting to polymerize. Crack a window and keep going.
Can You Season Cast Iron Without an Oven?
Yes, and it’s worth knowing this method for touch-ups even if the oven stays your main tool.
- Stovetop touch-up: Heat the pan over medium-high, rub in a thin coat of neutral oil, and let it heat until it just barely smokes. Wipe off the excess and let it cool. This works well for small bare spots but tends to season unevenly across the whole pan compared to an oven bake.
- Grill or campfire seasoning: Works the same way as the oven. Place the pan upside down over indirect heat and keep flames away from the cooking surface to avoid warping or scorching.
- When to choose which: Grab the stovetop method when you need a five-minute fix after cleaning. Reach for the oven when you’re building seasoning from scratch or restoring a badly worn pan, since even heat means fewer repeat coats.
What’s the Best Way to Clean and Maintain Seasoning?
Good seasoning survives cleaning; it doesn’t survive neglect. Rinse the pan with hot water right after cooking and use a stiff brush or a scour of kosher salt and a paper towel to knock loose stuck-on food. Deglazing with hot water while the pan is still warm works better than aggressive scrubbing, and it protects the seasoning instead of stripping it. Skip cold water altogether. Dropping a hot pan into a cold sink can cause it to warp or crack.
Dish soap is fine occasionally. Modern soap doesn’t strip a well-built seasoning layer the way old cast-iron myths claim, but there’s no need to scrub with it every time.
- Dry the pan completely with a towel, then set it on a warm burner for a minute to drive off any remaining moisture.
- Rub in a tiny amount of oil (about half a teaspoon for a 12-inch skillet) while the pan is still warm, then buff off any excess with a paper towel.
- Skip the excess oil. Too much turns gummy over time instead of building a smooth layer.
Pro Tip: Cook fatty foods like bacon or fried chicken in a brand-new pan before you tackle a long acidic simmer. Tomato sauce and wine can dull a thin seasoning layer that hasn’t had time to build up strength.
How Do You Fix a Sticky, Rusty, or Flaking Pan?
Most cast-iron problems have simple fixes, and almost none require starting over.
- Sticky or gummy surface usually means the oil never fully polymerized, often from too much oil or not enough heat. Scrub the tacky spot with hot water and salt, dry thoroughly, then remake one or two very thin coats at 450°F.
- Small rust spots respond to a scrub with steel wool right down to bare metal, followed by a full dry and a fresh coat of oil baked on. If rust covers large areas or keeps returning, that’s a sign moisture is getting trapped somewhere, and the pan needs a fuller reseason.
- Flaking means the seasoning never bonded properly to the metal. Scour the flaking areas back to a stable surface, then build the seasoning back up with several thin coats rather than one heavy one.
- Severely rusted or damaged pans sometimes need a full strip: steel wool, sanding, or even electrolysis for stubborn vintage pieces. Electrolysis works well outdoors but produces hydrogen gas, so it needs ventilation and care. Reserve this level of effort for pans that are genuinely far gone, not for a little stickiness.
What Forkwardkitchen Has Learned from Testing in Cast Iron
Testing recipes in cast iron week after week teaches you something the seasoning guides don’t always say outright: the pan gets better the more ordinary cooking you throw at it. Regular use and light touch-ups beat aggressive reseasoning in nearly every case, and that tracks with what shows up in a working kitchen testing dozens of skillet dishes.
The practical rule that comes out of that: do less. Skip the marathon multi-coat seasoning sessions unless you’re restoring a genuinely bare pan, and let cooking do the heavy lifting instead.
- Wipe the pan down right after cooking while it’s still warm.
- Heat-dry it on the stove for a minute to chase off moisture.
- Rub in a tiny swipe of oil before it goes back in the cabinet.
That three-step ritual takes under two minutes and it’s the single habit that keeps a skillet in good shape for years.
An Honest Take on Perfect Seasoning
Seasoning is far more forgiving than most people assume walking into it. A patchy spot, a little stickiness, even a rust freckle from a pan left wet overnight. None of it means starting over. My own ritual is dead simple: wipe, dry on the burner for a minute, swipe in a little oil, done. Cook with the pan more than you worry about it, and the seasoning takes care of itself.
— Oloru
Cook Your Way to Better Seasoning
The fastest way to build seasoning isn’t another round of oiling and baking. It’s using the pan. Forkwardkitchen tests every recipe in-house, and a good chunk of them lean on a skillet doing real work: high heat, rendered fat, the kind of cooking that naturally deepens a seasoning layer with each use.
Start with something that puts fat and heat to work right away, like brown butter skillet cornbread, which bakes directly in the pan and leaves behind a beautiful sheen. Or go savory with a skillet French onion chicken that sears, braises, and finishes under the broiler, all in the same pan. Every recipe comes with an honest difficulty rating, so you’ll know what you’re getting into before you start. Browse the full recipe collection and pick something that puts your skillet to work tonight.
Sources
This guide draws on tested methods from Serious Eats, the seasoning science covered by Bon Appétit, maintenance advice from America’s Test Kitchen, manufacturer guidance from Lodge, and restoration techniques from AmazingRibs.
FAQ
Should I Season Cast Iron at 350 or 450 Degrees?
Either works, but 450°F is the better baseline for most home ovens because it gets the oil past its smoke point faster and produces a harder cured layer. Lodge recommends 450°F to 500°F for an hour, while some guides suggest 350°F to 400°F for a slightly gentler bake. If your kitchen struggles with smoke at higher heat, 400°F is a fine compromise.
How Many Times Should I Season My Cast Iron?
A new or lightly worn pan usually needs just one to three coats to build a solid base, since seasoning strengthens with regular use afterward. A pan stripped down to bare metal benefits from three to six coats before it’s ready for daily cooking.
How Do I Season My Cast Iron Cookware Step by Step?
Wash and dry the pan, rub on a very thin coat of neutral oil, buff off the excess, and bake it upside down at 450°F for about an hour. Let it cool in the oven, then repeat once or twice more if the pan was bare to start.
Do You Need to Season Cast Iron Regularly?
Not as often as most people think. Most cookware ships pre-seasoned, and regular cooking maintains that layer without any extra oven work. A full reseason is only necessary after stripping the pan or when rust or flaking gets bad enough that light touch-ups won’t fix it.