July 28, 2026
Cold Ferment Pizza Dough: 48-Hour Home Cook Guide
Elevate your pizza game with cold ferment pizza dough. Learn how a 48-hour chill transforms your crust into a flavorful masterpiece!

Cold Ferment Pizza Dough: 48-Hour Home Cook Guide
Cold ferment pizza dough is the single best upgrade you can make to your home pizza game. Mix the dough the night before, slide it into the fridge for 48–72 hours, and you will get a crust with deeper flavor, better browning, and a dough that stretches without fighting you. That’s the short version.
For most home cooks, a moderate period is the sweet spot, giving enzymes enough time to work without risking a structural breakdown. Use 62–70% hydration, a strong bread flour or Tipo 00, and keep your instant yeast dose tiny: around 0.1–0.3% of flour weight depending on how long you plan to ferment.
TL;DR checklist:
- Mix night: Combine flour, water, salt, and a small yeast dose; rest 15–20 minutes, then ball and refrigerate within 20 minutes.
- Fridge time: several days at typical refrigerator temperatures; a midpoint duration delivers the best balance of flavor and structure.
- Bake day: Pull dough 1–2 hours before baking, let it temper at room temperature, then stretch and bake on a preheated steel or stone at your oven’s maximum heat.
Table of Contents
- The Forkwardkitchen tested cold-ferment pizza dough recipe
- Step-by-step: from mix to bake
- How do 24, 48, 72, and 96+ hours compare?
- Which flour, hydration, and yeast work best for cold fermentation?
- Fridge setup, containers, and freezing dough
- How to stretch and proof cold-fermented dough before baking
- How to bake cold-fermented pizza at home
- Troubleshooting common cold-ferment problems
- What actually happens to dough during cold fermentation?
- Pro tips and emergency fixes for pizza night
- Key Takeaways
- Cold fermentation is not always the right call
- More tested recipes from Forkwardkitchen
- Useful sources and further reading
The Forkwardkitchen tested cold-ferment pizza dough recipe
This is the recipe Forkwardkitchen uses as its baseline for cold-fermented dough. It’s built around a 48–72-hour retard, though it performs well anywhere from 24 to 72 hours. Weights come first; baker’s percentages follow so you can scale freely.
Ingredients
| Ingredient | Weight | Baker’s % | Notes |
|---|---|---|---|
| Bread flour or Tipo 00 | 500 g | — | 12–13% protein minimum |
| Water (90–95°F) | 350 g | 70% | Adjust down to 62% for wetter kitchens |
| Fine sea salt | 14 g | 2.8% | Add after initial hydration |
| Instant dry yeast (IDY) | 1.5 g | 0.3% | For 24–72 hr; see table below for longer |
| Diastatic malt powder | 1.5 g | 0.5% | Optional; boosts browning in home ovens |
Yield: 3 dough balls, approximately 288 g each, making three 12-inch pizzas.
Total timeline: Mix on Day 1 evening → fridge for 48–72 hours → bake on Day 3 or 4 evening.
Final dough temperature target: 75–80°F after mixing. If your kitchen runs cold, use warmer water; if it’s hot, dial the water temperature back.
Yeast dose by fermentation length
| Ferment length | IDY dose (per 500 g flour) | Notes |
|---|---|---|
| Short duration | higher yeast dose | More active start needed |
| Moderate duration | standard yeast dose | Typical default |
| Longer duration | reduced yeast dose | To avoid over-proofing |
| Extended duration | minimal yeast dose | Requires strong flour; more risk |
The 48–72-hour reference formula uses roughly 0.1% IDY at 62% hydration as a conservative baseline. The Forkwardkitchen version runs slightly higher hydration (70%) and a proportionally adjusted yeast dose for a more open crumb.
Pro Tip: Weigh your yeast on a scale that reads to 0.1 g. At 1.5 g, a half-teaspoon estimate can easily double the dose and blow your timeline.
Scaling: To make 6 balls, double every ingredient. The method stays identical. For 2 balls, multiply each weight by 0.67.
Step-by-step: from mix to bake
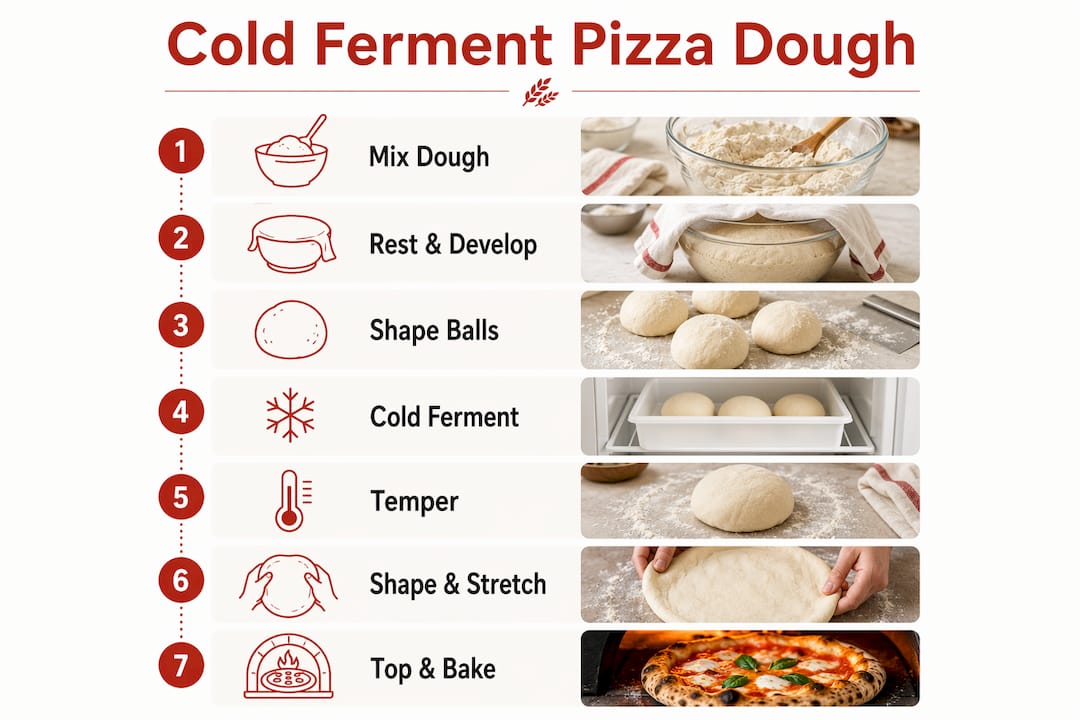
1. Mix the dough (Day 1, evening)
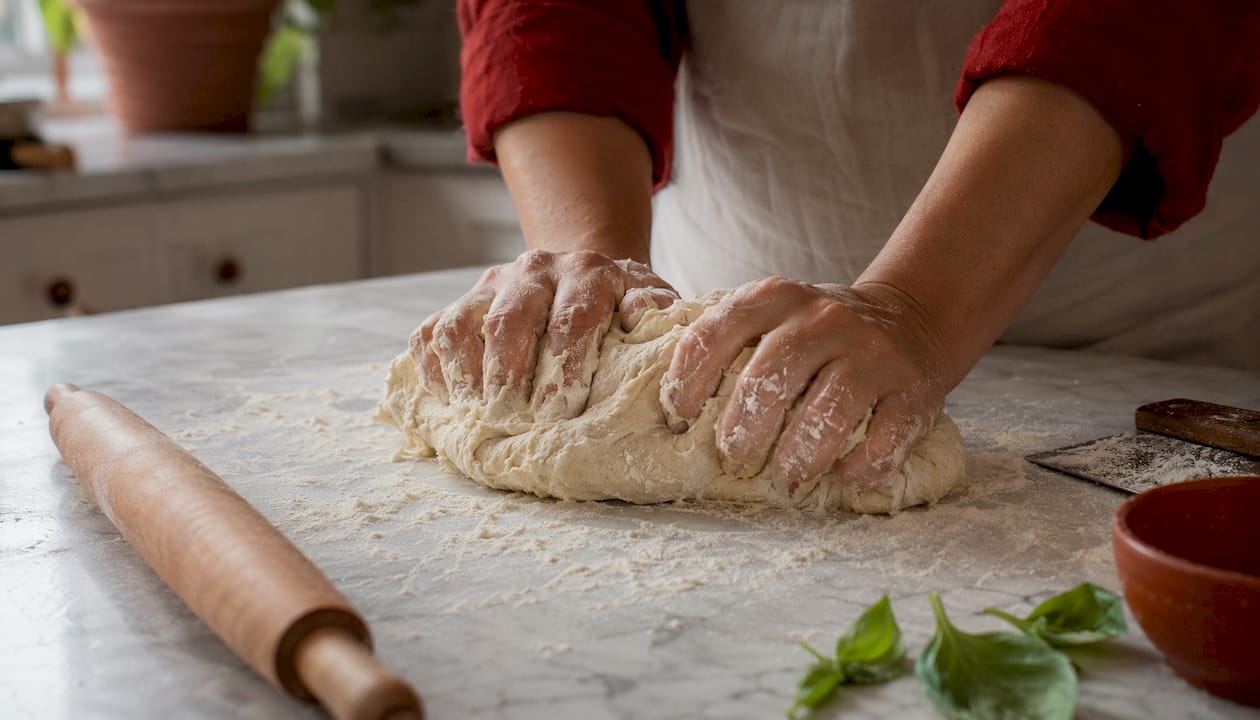
Measure 350 g of water at 90–95°F into a large bowl. Add 500 g flour and mix with your hand or a dough whisk until no dry spots remain, about 1 minute. The dough will look shaggy. Add 14 g salt and work it in using the pincer method: pinch through the dough mass repeatedly with your thumb and forefinger, alternating with folds, for 30–60 seconds.
2. Rest and develop gluten
Cover the bowl and let the dough rest 15–20 minutes. This isn’t a true autolyse, but it lets the flour fully hydrate and initial gluten bonds form without extra kneading. After the rest, give the dough 2–3 minutes of folding in the bowl until it feels cohesive and slightly tacky.
3. Ball and refrigerate immediately (Lehmann method)
Divide the dough into 3 equal pieces (about 288 g each) and shape each into a tight ball. Place each ball in a lightly oiled container with a lid, or use a covered dough tray. Refrigerate within 20 minutes of finishing the mix. Smaller balls cool faster and more evenly than a single bulk mass, which can keep fermenting at its warm core for hours.
4. Cold ferment in the fridge
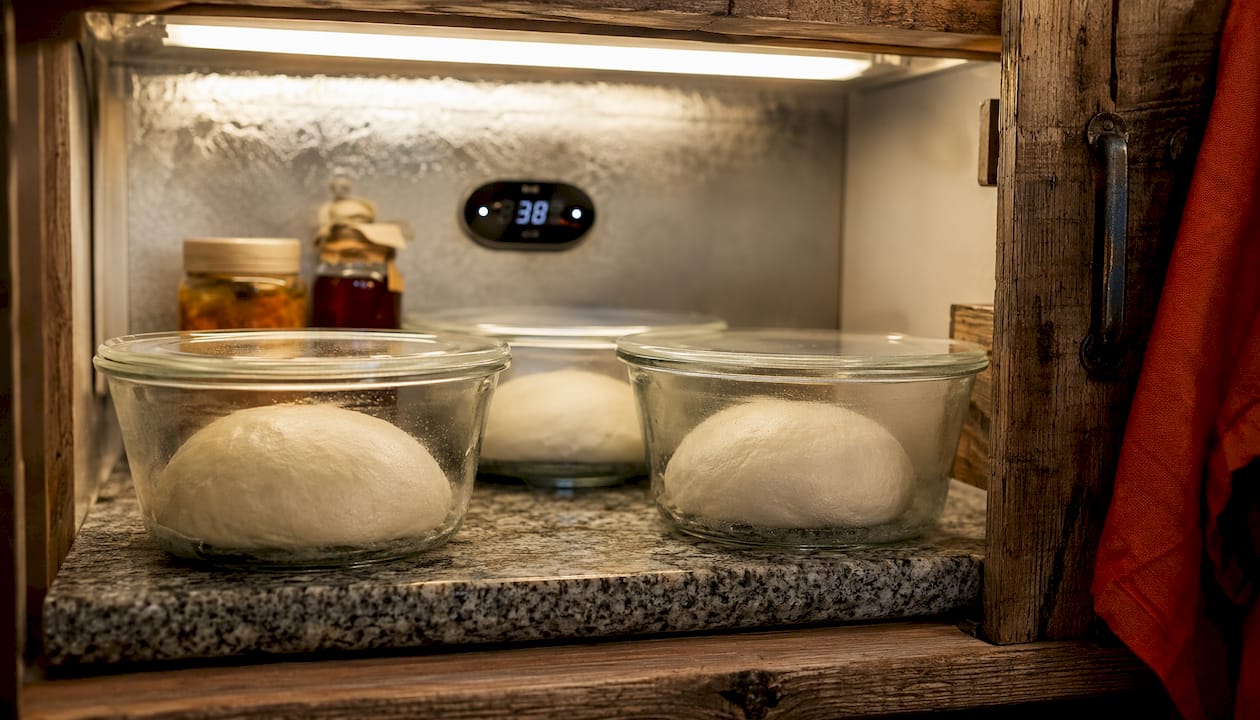
Leave the dough undisturbed for 24–72 hours. You don’t need to punch it down or fold it during this phase. The balls will slowly expand and develop small bubbles on the surface. The deepest flavor and extensibility come between 48 and 72 hours, where enzyme activity peaks before acidity builds.
5. Optional: Gemignani two-phase method
For extra structure and a lighter crumb, degas and reshape each ball after the first 24 hours, then return to the fridge for another 24 hours. This two-phase approach can produce stronger gluten organization than a single undisturbed retard.
6. Temper at room temperature
Pull the dough 1–2 hours before baking. Leave it covered on the counter. Cold dough is tight and elastic; trying to stretch it straight from the fridge leads to tearing and snap-back. Target an internal temperature of roughly 60–65°F before shaping.
7. Shape and stretch
Dust your work surface lightly with flour or semolina. Press the ball flat with your fingertips, working from the center outward and leaving a thicker rim. Lift the dough and let gravity do the stretching, rotating it gently. Avoid a rolling pin; it deflates the gas bubbles that create an open crumb.
8. Top and bake
Transfer the stretched dough to a lightly floured pizza peel. Add sauce, cheese, and toppings. Launch onto a preheated baking steel or stone and bake at your oven’s maximum temperature (500–550°F) until the crust is spotted and the cheese is bubbling, typically 6–9 minutes.
Timing at a glance
| Step | When | Duration |
|---|---|---|
| Mix and ball | Day 1, 8:00 PM | 20 min |
| Cold ferment | Day 1 night → Day 3 | 48 hours |
| Temper at room temp | Day 3, 4:00 PM | 1–2 hours |
| Preheat oven and steel | Day 3, 5:00 PM | 45–60 min |
| Stretch, top, bake | Day 3, 6:00 PM | 7–9 min per pizza |
Visual cues to watch:
- Dough balls have visibly expanded and show small surface bubbles after cold ferment.
- After tempering, the dough passes the poke test: press a finger in lightly and it springs back slowly, not immediately.
- During baking, the crust puffs and develops dark spots (leoparding) within the first few minutes on a hot steel.
How do 24, 48, 72, and 96+ hours compare?
Choosing your fermentation length is really a question of what you want from the crust and how your week is structured. A 24-hour fridge rise is sufficient for a good pizza; 48–72 hours produces the deepest flavor and best extensibility for New York and Neapolitan-style doughs, as most guides recommend.
Cold-ferment duration comparison
| Duration | Flavor | Handling | Risk level | Best for |
|---|---|---|---|---|
| 24 hours | Mild, yeasty | Slightly stiff | Low | Weeknight pizza, beginners |
| 48 hours | Complex, slightly tangy | Relaxed, extensible | Low-medium | Home cook sweet spot |
| 72 hours | Deep, nuanced | Very extensible | Medium | Weekend project, strong flour |
| 96+ hours | Tangy, can turn sour | Slack, fragile | High | Experienced bakers only |
Beyond 72 hours, acidity can inhibit Maillard browning and risk structural breakdown. The gains past 72 hours are marginal for most home setups.
Planning calendar examples
24-hour plan: Mix Thursday evening → bake Friday evening.
48-hour plan: Mix Wednesday evening → bake Friday evening. (Forkwardkitchen default.)
72-hour plan: Mix Monday evening → bake Thursday evening. Use a stronger flour and reduce yeast to 0.5–0.8 g per 500 g.
Signals that tell you to stop:
- Surface bubbles are large and the dough feels very soft or sticky when you open the container.
- A strong alcoholic or sour smell means fermentation is running ahead of schedule.
- The dough has visibly collapsed or deflated in the container.
If you see any of those signs before your planned bake time, move to baking immediately or repurpose the dough as a pan pizza.
Which flour, hydration, and yeast work best for cold fermentation?
Flour
Protein content is the deciding factor. Cold fermentation activates protease, which slowly breaks down gluten. A weak flour can’t survive a long retard. For extended fermentations of 48–72 hours, use a strong, high-protein flour.
- 24 hours: All-purpose flour (10–11% protein) works fine.
- 48 hours: Bread flour (12–13% protein) or Tipo 00 with a high W-value (W 280–320).
- 72+ hours: High-protein bread flour (13%+) or a strong Tipo 00 (W 330+). Weak flours risk gluten network collapse.
Tipo 00 produces a silkier, more extensible dough and is the traditional choice for Neapolitan-style pizza. Bread flour gives a chewier, more structured crumb and is easier to find at any American grocery store.
Hydration
| Hydration | Range | When to use |
|---|---|---|
| Low | 62–70% | Beginners, home ovens below 500°F, pan pizza |
| Medium | 65–70% | Standard home oven (500–550°F), most styles |
| High | 70% | Experienced shapers, very hot ovens or steel |
Higher hydration doughs are stickier and harder to shape. Start at 65–68% if you’re new to cold-fermented dough and work up from there.
Salt and yeast
Salt at 2.6–2.8% of flour weight is standard. It slows fermentation slightly and strengthens gluten. Don’t drop below 2% or the dough will taste flat.
Instant dry yeast (IDY) is the most reliable choice for cold fermentation because it activates without proofing and disperses evenly. Active dry yeast (ADY) works but needs to be proofed first and requires a slightly higher dose (multiply IDY amount by 1.25). Refer to the yeast dose table in the recipe section for specific amounts by ferment length.
Fridge setup, containers, and freezing dough
Temperature and placement
The FDA recommends keeping refrigerators at 40°F (4°C) or below. The problem is that most domestic fridges vary by several degrees depending on where you place food. Put a cheap thermometer on the shelf where your dough will sit and check it before committing to a long retard. A fridge running at 45°F will over-ferment your dough hours ahead of schedule.
Modernist Cuisine recommends ~39°F (4°C) as the optimal cold-proofing temperature. The back of the middle shelf is usually the coldest and most stable spot.
Containers
Use individual lidded containers for each dough ball. A 1-quart deli container works perfectly and is cheap. Leave at least 50% headroom so the dough has room to expand without pressing against the lid. Avoid wrapping dough balls loosely in plastic wrap; they dry out and form a skin that tears during shaping.
If you’re making a large batch, a covered dough tray (the kind used in pizzerias) holds 6–8 balls and stacks easily.
Pro Tip: Lightly oil the inside of each container before placing the dough ball. It prevents sticking and makes removal clean, even after 72 hours.
Freezing and thawing
- Mix and ball the dough as normal.
- Place balls in lightly oiled containers and refrigerate for 24 hours (let fermentation start before freezing).
- Transfer to freezer-safe zip-lock bags, pressing out air, and freeze for up to 3 months.
- To thaw, move bags to the fridge 24 hours before baking, then temper at room temperature for 1–2 hours as usual.
Freezing mid-retard (after 24 hours of cold fermentation) gives better results than freezing immediately after mixing. The dough has already developed some structure and flavor before the freeze.
Scaling for large batches
Multiply every ingredient by the number of dough balls you need. The method is identical. The only practical change: larger batches take longer to cool in the fridge, so add 2–3 hours to your expected fermentation timeline, or split the dough across two shelves for faster cooling.
How to stretch and proof cold-fermented dough before baking
Cold dough needs time to relax before it will cooperate. Pull it from the fridge too soon and it snaps back like a rubber band. The goal is to bring the dough to roughly 60–65°F before shaping.
Warm-up and bench rest
- Remove dough balls from the fridge 1–2 hours before baking. The exact time depends on your kitchen temperature: a 75°F kitchen needs about 60 minutes; a 65°F kitchen may need closer to 90 minutes.
- Leave balls covered on the counter. Don’t uncover them until you’re ready to shape, or the surface will dry out.
- Check readiness with the poke test: press a floured finger about half an inch into the dough. If it springs back slowly and incompletely, it’s ready. If it springs back immediately, give it another 15–20 minutes.
Stretching technique
- Dust your work surface with flour or a mix of flour and semolina.
- Press the ball flat with your fingertips, starting from the center and pushing outward. Leave a 1-inch rim untouched for the crust.
- Pick the dough up and drape it over your knuckles. Let gravity stretch it, rotating slowly. Don’t pull aggressively.
- Lay it back on the surface and check for even thickness. Patch any thin spots by folding gently.
Rescuing over-chilled dough: If the dough still snaps back after 90 minutes of tempering, set it on a warm (not hot) surface or near a warm oven vent for 15 minutes. Don’t rush it with direct heat.
Rescuing slightly over-fermented dough: If the dough feels very soft and tears easily, handle it minimally. Shape it directly into a sheet pan rather than trying to stretch it thin. It will bake fine as a thicker, pan-style pizza.
How to bake cold-fermented pizza at home
The biggest gap between home pizza and pizzeria pizza is oven temperature. Professional ovens run at 800–900°F. Your home oven maxes out at 500–550°F. The fix is a baking steel or stone, which stores and transfers heat far more aggressively than a bare oven rack.
Baking surface comparison
| Surface | Heat transfer | Preheat time | Best for |
|---|---|---|---|
| Baking steel | Very high | 45–60 min | Thin crust, NY-style, Neapolitan |
| Baking stone | High | 45–60 min | Most styles, slightly more forgiving |
| Sheet pan | Low-medium | 15 min | Pan pizza, thick crust, beginners |
| Grill (charcoal/gas) | Very high | 20–30 min | Char-heavy, outdoor baking |
Setup tips:
- Place steel or stone on the top rack, 4–6 inches from the broiler element.
- Preheat at your oven’s maximum temperature (500–550°F) for at least 45 minutes. The steel needs that full time to reach temperature.
- Switch to broil for the last 2–3 minutes of baking to blister the top while the bottom stays crisp.
- For a sheet pan, oil it generously and preheat it in the oven before adding the dough.
Temperature and timing
Bake at 500–550°F. A 12-inch pizza on a hot steel takes 6–8 minutes. On a stone, expect 8–10 minutes. Watch for these cues: the crust puffs and develops dark spots, the cheese bubbles and begins to brown, and the underside is deep golden when you lift an edge with a spatula.
For a charcoal grill, place the dough directly on clean grates over medium-high heat with the lid closed. Check at 4 minutes; most pizzas finish in 5–7 minutes.
Troubleshooting common cold-ferment problems
Quick diagnosis
| Symptom | Likely cause | Fix |
|---|---|---|
| Dough won’t stretch, snaps back | Too cold, under-tempered | Rest 20–30 more minutes at room temp |
| Dough tears easily, very sticky | Over-fermented or too high hydration | Shape as pan pizza; reduce hydration next batch |
| No oven spring, flat crust | Over-proofed or under-heated | Check fridge temp; preheat steel longer |
| Dense, gummy crumb | Under-fermented | Extend fridge time or increase yeast slightly |
| Strong alcoholic smell | Over-fermented | Bake immediately as pan pizza or flatbread |
| Pale crust, no browning | Oven too cool or no steel/stone | Add diastatic malt; use broiler finish |
Over-fermentation
If the dough has collapsed and smells sour or alcoholic, it’s past peak. You can still bake it, but expect a denser crumb, less oven spring, and a tangier flavor. The gluten network has been degraded beyond recovery. Don’t try to reshape and re-proof it; just press it into a sheet pan, add toppings, and bake as a thick-crust pizza or focaccia.
The poke test for under-development: If the dough shows no activity after warming for 90 minutes, press a finger in and watch. No spring-back at all means it’s either over-fermented or the yeast was inactive. A 30–60 minute warm rest sometimes revives sluggish dough; if nothing changes, repurpose it.
Sticky, slack dough that won’t hold shape: This usually means either too much yeast for the ferment length, a fridge running too warm, or flour with insufficient protein. Use it as a pan pizza this time. Next batch, reduce yeast by 30% or switch to a stronger flour.
What actually happens to dough during cold fermentation?
At refrigerator temperature (38–40°F), yeast activity drops to roughly 10% of its room-temperature rate. But the enzymes naturally present in flour, amylase and protease, retain 40–50% of their activity. That asymmetry is the whole point of cold fermentation: enzymes work 4–5 times harder relative to yeast than they would at room temperature.
What each enzyme does:
- Amylase breaks down starches into simple sugars. Those sugars feed Maillard browning reactions during baking, producing the dark spots and complex flavors that same-day dough can’t match.
- Protease gently degrades the gluten network, making the dough extensible rather than elastic. This is why cold-fermented dough stretches easily without snapping back.
- Lipase breaks fats into fatty acids, adding subtle flavor depth over longer ferments.
The result is a dough with over 50 distinct flavor compounds that don’t exist in same-day dough, dramatically easier stretching, and better Maillard browning even at home oven temperatures.
The limit matters too. Beyond roughly 72 hours, acidity accumulates and can actually suppress Maillard reactions while protease continues weakening the gluten structure. That’s why dough pushed past 72–96 hours often tastes sour and feels spongy rather than extensible. The sweet spot is 48–72 hours, where enzyme activity has done its best work before acidity tips the balance.
Pro tips and emergency fixes for pizza night
48 hours before baking:
- Mix and ball dough; refrigerate immediately.
- Confirm fridge temperature is at or below 40°F.
12 hours before baking:
- Check dough balls visually. They should have expanded and show small bubbles. If they look very puffy or smell strongly alcoholic, plan to bake sooner.
1 hour before baking:
- Pull dough from the fridge; leave covered at room temperature.
- Start preheating oven with steel or stone at maximum heat.
10 minutes before baking:
- Poke-test the dough. Slow spring-back means it’s ready.
- Dust peel with flour or semolina; stretch the first ball.
Emergency fixes:
- Dough over-fermented: Press into an oiled sheet pan. Top and bake as pan pizza at 450°F for 18–22 minutes.
- Dough under-developed (stiff, no bubbles): Leave at room temperature for an additional 30–60 minutes. If still no activity, increase oven temperature and bake anyway; the crust will be denser but still edible.
- Dough too sticky to shape: Flour your hands and the surface generously. Work quickly and handle minimally. If it tears, patch and bake as a rustic flatbread.
Pro Tip: Always change only one variable between test batches — yeast percentage, hydration, or ferment time. Keep a simple kitchen log with the date, flour brand, fridge temp, and result. Your fridge and flour behave differently than anyone else’s, and a few notes will teach you more than any chart.
Pair your finished pizza with a well-chosen wine. A guide to wine and pizza pairings can help you match the right bottle to the style you baked.
Key Takeaways
Cold-fermented pizza dough peaks at 48–72 hours in the fridge, using 0.1–0.3% instant dry yeast, 62–70% hydration, and a high-protein bread flour or Tipo 00 for the best balance of flavor, structure, and extensibility.
| Point | Details |
|---|---|
| 48–72-hour sweet spot | Ferment for 48–72 hours at 38–40°F for the deepest flavor and best extensibility without structural risk. |
| Yeast dose matters | Use 0.5–1.5 g IDY per 500 g flour, scaling lower for longer ferments; for 48 hours, 0.1–0.3% is standard. |
| Strong flour is required | Use bread flour (12–13% protein) or high-W Tipo 00 for ferments of 48 hours or longer. |
| Temper before shaping | Pull dough 1–2 hours before baking; target 60–65°F before stretching to prevent tearing. |
| Forkwardkitchen recipe | The tested 70% hydration, 0.3% IDY formula is a reliable starting point for home cooks, and a 48-hour timeline is consistently effective. |
Cold fermentation is not always the right call
Cold fermentation is genuinely transformative for thin-crust pizza. But it’s not a universal upgrade, and treating it as one leads to frustration.
Modernist Cuisine cautions that long cold retards can actually hurt pan-baked or very high-hydration doughs. A focaccia-style dough at 80% hydration that goes into the fridge for 48 hours often comes out with a compromised texture: the gluten has been relaxed to the point where it can’t hold the open, airy structure you want. Same-day or room-temperature fermentation gives those doughs better volume and a lighter crumb.
There’s also a scheduling reality. Cold fermentation requires planning 2–3 days ahead. If it’s 5 PM and you want pizza tonight, a same-day dough with more yeast and a 2-hour room-temperature rise is the right answer. It won’t have the same depth of flavor, but it will be good pizza. Chasing cold fermentation on a tight timeline produces rushed, under-developed dough.
Authentic Neapolitan practice often relies on room-temperature fermentation with seasonal yeast adjustments, not refrigeration. Cold fermentation became popular outside Naples partly as a scheduling tool and partly because home cooks can’t control ambient temperature the way a professional pizzeria can. It’s a practical adaptation, not a sacred technique.
When cold fermentation is the right choice:
- You want maximum flavor from a thin-crust pizza and have 2–3 days to plan.
- Your kitchen runs warm and room-temperature fermentation is hard to control.
- You’re baking for a crowd and need to prep dough in advance.
When room-temperature or same-day dough is better:
- You’re making focaccia, pan pizza, or any very high-hydration dough.
- You need pizza tonight.
- You’re new to dough and want to learn the basics before adding fridge variables.
The honest take: cold fermentation is a tool, not a rule. Use it when it fits your schedule and your style of pizza. Skip it when it doesn’t.
More tested recipes from Forkwardkitchen
If this cold-ferment method clicked for you, there’s a lot more where it came from. Forkwardkitchen builds every recipe the same way: tested from scratch, with honest difficulty ratings and real technique notes so you know exactly what you’re getting into before you start.

The full recipe collection covers everything from fast weeknight dinners to weekend projects like this one. If you want to keep pushing your technique, the advanced recipe section has fermentation projects, laminated doughs, and other recipes that reward the same patience this pizza dough does. Browse, pick something that fits your week, and cook it with confidence.
Useful sources and further reading
-
JayArr Pizza: Cold Fermentation Complete Guide — The most thorough breakdown of enzyme activity, yeast behavior, and fermentation timelines available for home cooks. Read this if you want to understand the science behind every decision in this article.
-
PizzaBlab: How to Cold Ferment Pizza Dough — Covers the Lehmann method in detail, including the case for balling immediately after mixing and the practical reasons it produces more predictable results than bulk cold fermentation.
-
Modernist Cuisine: Cold-Proofing Pizza Dough — The authoritative source on optimal fridge temperature (39°F) and the styles where cold proofing helps versus hurts. Worth reading before committing to a 72-hour retard.
-
PizzaStunde: 24, 48, or 72 Hours? — A practical comparison of fermentation lengths with notes on Neapolitan tradition and how cold fermentation fits (and doesn’t fit) into authentic Italian practice.
-
Fond Kitchen: Cold Fermentation Guide — Includes a conservative reference formula (62% hydration, 0.1% IDY) and practical notes on fridge temperature management and the FDA’s 40°F guidance.
-
Serious Eats: The Pizza Lab on Cold Fermentation — The clearest explanation of over-fermentation signs and the poke test for diagnosing dough on bake day. Essential troubleshooting reading.